 |
| Pre-Meeting Wood Talks |
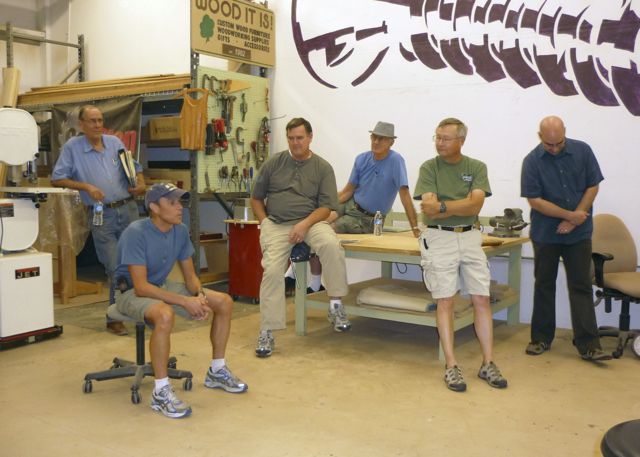
We began the meeting with a show and tell session. Derrick started off by showing us his clipboards that he's been making from whatever scrap materials he's able to scavange.
 |
| Derrick's Clipboards |
Leroy brought in a good sized chunk of Olive wood that was given to him by a neighbor. I'm estimating that it was pretty close to 2" x 6" x 3' and really could use some scrub plane or jointer work. Be interesting to see how it will finish turn out. He mentioned a website that I gave him that has virtually any species of wood photographed in great detail, here's a link to that, it's pretty interesting I think. http://www.hobbithouseinc.com/personal/woodpics/
Ted mentioned that he has a 10" Unisaw for sale and also brought in a Woodworkers Logbook.
 |
| Logbook & Unisaw For Sale |
It's the binder that he's holding in the picture. It was from Lee Valley but when I checked their site I couldn't find it. If you search for Woodworkers Logbook at Amazon they listed 4, used copies but there wasn't any detail or picture. If you need Ted's contact information to see about the saw just contact me and I'll forward it to him.
Before we get to the main event there's one more thing to mention. You've probably all seen the bench top workbench I bring in to do my demonstrations. Jamie will be offering a class on how to build one of your own that I'll be teaching. The class dates are August 13 - 30 and will meet on Tuesday and Thursday evenings from 6-9pm. Even if you're a young guy your back will thank you for being able to raise your work level when routing, carving, cutting joints, etc. Us older guys have a hard time straightening up after being haunched over the wood for a while! To sign up for the class contact Jamie, if you want any other information feel free to contact me.
On to the main event, Sharpening. To paraphrase Jamie, she said:
"Ask 10 woodworkers how they sharpen and you'll probably get 12 different answers"
 |
| Eric Ready to Go |
She's right on with that expression. Eric gave an excellent demonstration and whether you've been sharpening for years or just getting into it I'm sure we all gained a bit of knowledge from him.
Eric started out by asking the group what our experiences were and what we would like to gain from his talk. He made a generous offer to us and said that since the tool junkie in him had amassed pretty much any sharpening tool you could think of he'd let us try it out from his collection before spending money on something we're not sure of. For him, his sharpening goal is to have his tools be sharp and perform the way he needs to use them. Other than carving tools, the main shape of tools used for cabinet or furniture work will have a sharp edge and a flat profile. The most common angles are 25 and 30 degrees. To illustrate exactly what a sharp edge is, he used this aid:
 |
| Sharp Edge |
Basically a sharp edge is two angles that come together with a minimum radius. I think I got that right but you all will know what I mean. You want a zero radius where the back and the bevel meet, that defines sharp. There are a number of ways to go about getting your tools to that point.
 |
| Water Stones |
Generally man-made materials, cut fast but messy. Stones require frequent flattening. First ones were usually from Japan but now available from many different sources.
 |
| Diamond Stones |
These are industrial grade diamonds joined to a metal plate. They're generally slower cutting but do not require flattening and are durable.
 |
| Oil Stones |
These are a natural material, most of us have heard of Arkansas stones. They use oil as a lubricant and are a bit neater than water stones. They won't require flattening but are not the best choice for many of the hi-tech, modern metals used to cutting edges today.
 |
| Glass and Abrasive Papers |
Sometimes referred to as the "Scary Sharp" method which is inexpensive to start out but the costs continue as you need to replace your supply of abrasive papers. You need a piece of float glass, at least 3/8" thick and 3M #77 spray adhesive to stick the paper to the glass.
I omitted prices for these different methods because there is such a wide range. I'll go out on a limb and say that you get what you pay for. Only you can answer the question as to what the sharpening equipment is worth to you -- you know your budget constraints.
After discussing the different sharpening methods there are a few aids that help you achieve that sharp tool so you can do your best work. The simplest is a black sharpie to color the edge before you sharpen. This will show you where your stones or grinding wheel is making contact.
Along with a simple roller guide (Jamie sells them) your wise to make what Eric referred to as a projection jig:
 |
| Projection Jig |
Simply put, the blocks are screwed/glued to a piece of plywood and once you've put the tool you're going to sharpen into the roller guide you place the roller against the edge of the ply and the end of your blade against the appropriate block. It'll take a bit of time setting things up with a protractor but once you've made this jig you'll be able to quickly set the correct angle.
The first step to sharpening any flat blade is to flatten the back. Remember that sharp = 2 surfaces coming to a zero radius. Unless the back of your plane iron or chisel is flat you won't be able to achieve that. Fortunately this only needs to be done once unless you were to severely damage the tool. You can use any one of the sharpening methods to achieve this and use the appropriate fluid to keep your stones clean. You start with the roughest grit needed and can monitor your progress by checking your scratch pattern and marking made with your sharpie. Turning the tool 90 degrees for each grit will help you see that scratch pattern. After the back is flattened you can turn your attention to the bevel.
There are two basic ways of getting that bevel. If you have a grinder you can begin with hollow or radius grinding. If you don't have a grinder the bevel can be achieved using the hand methods. Grinders tend to scare people because although they work quickly they can also screw things up quickly and there's the risk of taking the temper out of the steel by over-heating. Eric had an excellent suggestion and that was to go to flea markets or garage sales and buy "crap" chisels and files to practice with.
 |
| Holding the Chisel on the Grinder Tool Rest |
 |
Notice how the grinder has all guards in place, the can is for water used to keep the tool cool. What appears to be an old style razor is actually a wheel dresser. This is used to flatten the wheel but Eric recommends putting a slight crown on the wheel to avoid over-heating the edges of your tool.
Grinding is only needed if the blade has been damaged or honed so often that it is too short to put the appropriate angle on. The grinding process can be done by hand, generally using coarser abrasives on glass -- and again; this doesn't need to be done very frequently.
After grinding the edge needs to be polished to ensure long life and clean cuts. The more of a polish you can get, the better and easier your tool will work for you. A sharp tool is much safer than a sharp tool that you have to force through your work. You can use any of the ways discussed to polish your tools. Work from the roughest grit through the finest ones. How do you know you've gone far enough --- feel for that wire edge that will form on the back of the tool as you work the bevel.
Erics' demo was well planned and presented. To go back to what Jamie said about asking woodworkers about sharpening in my opinion it can be summed up like this: Pick your own poison and find a method that works for you and perfect it to do the type of wood work you want to achieve. If you're new to all of this maybe take Eric up on his generous offer to experiment with the different ways using his sharpening equipment before you invest your money into your own set-up.

