

I didn't think the politicians would win out over the woodworkers and by the time we started we had a good group of 26 or so, heck some even had to stand in the back.
We began the meeting with our customary round robin introductions and there were a couple of first timers, welcome to you! As far as our business portion of the meeting went there are a couple of exciting events coming up next month. Let's start with this one: Lie-Nielsen Tool Event will be at Jamie's again this year. Check out the link for a video and more information about it. They will be here Friday and Saturday the 16th. and 17th. of October. They usually invite a few select craftsman to set up a booth at these events and this year Dennis Patchett our accomplished carver was invited to show his work and skills.
The Woodcarvers club that meets at Woodworkers Emporium has a few classes in the planning stage. One will be on chip carving and the other will focus on carving Cottonwood bark. You may recall that Dennis and Randy brought in some examples of that type of work. They meet the fourth Saturday of the month.
 The Summerlin Craft Fair will be held in October as well. It has changed its location from the park on Town Center Drive to the new, outdoor mall located by the Red Rock Casino. The dates are October 10-11 and Downtown Summerlin is located on Charleston Blvd. west and the 215 Beltway. Not sure if any other members will be having a booth there but I will be set up with boxes and some furniture pieces.
Lastly, Mike noticed a neighbor cutting down a Mesquite tree so brought many pieces of it for and had it "up for grabs" for the many turners in our group. I saw all of them going out the door at the end of the meeting -- Thanks Mike!
Show & Tell
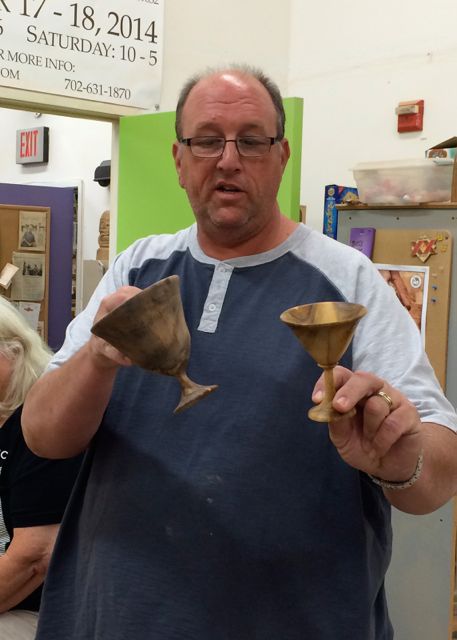
Speaking of wood turners, of the many members in our group that have gotten the bug, John brought in these examples of his latest work. These are examples of green wood turnings that take on some very interesting shapes as the wood air dries after being cut green. Wood for these were Apple and some sort of a Pepper tree. It's a little difficult to tell but notice how the rim of the one on the left is beginning to distort a little? That's what occurs after cutting the wood green as it begins to dry out. Nice work John!

I brought in this portable easel and palette made from some of the leftover Mahogany from the Armoire. It's a light weight assembly that an artist (my wife) can take for painting outdoors or attending workshops. It's used in conjunction with a camera tripod. The easel portion attaches by using the camera clip that comes with the tripod. The lower section is used for the paint palette, brushes, thinner, rags, etc.
Featured Presentation: Beth Wheeler
 |
| Beth and her Chair |
Beth recently returned from a week long, chair making workshop with Jeff Lefkowitz. Here is a LINK to his website. Although you may not be familiar with his name, many of you have heard of Brian Boggs and his chair making expertise. Here is a LINK to his site as well. The reason both of these names are brought up is because Jeff started out making chairs on his own but then, like Beth; took a class from Brian. He and Brian hit it off and eventually he became the only person authorized to teach the skill of making a Brian Boggs chair to others. An interesting note here is that although you can learn to make one, only Brian Boggs is allowed to sell them; the ones you make are for personal use only!
 |
| Extra Legs |
Before she left for the class which is located in Virginia she made arrangements to buy an additional set of back legs and also enough bark to make another chair when she arrived back in Las Vegas. These are carefully selected since they need to be steamed and then placed in a form Jeff made for about a week. Each leg blank needs to be steamed for 2-3 hours then quickly placed in the form and allowed to dry for a week or so in a heated closet. A unique feature of them is that they are canted at about 45 degrees to orient the wood grain for optimum joint strength.
Once the legs are ready to be worked and turned into these beautiful chairs the joints are cut where needed but Beth found a new passion in using a shave horse to transfer these square pieces of material into beautifully sculpted legs. This process begins with a drawknife and ends with a spokeshave. There is a video at the end of this blog where she did a short demonstration of this process.
 |
| Shave Horse Example |
A shave horse is a device that captures the wood in a vise that has pressure applied with your feet. Matter of fact, Beth was so enthralled by this device she ordered one for herself that was waiting for her at home when she returned from the workshop! The process of making a square piece round begins by cutting of the corners to create an octagon.
 |
| From square to round! |
Due to the time involved in making the rungs for the chair, Jeff had these lathe turned and ready for the workshop students to use. The official length of time for the workshop is 6 days so it was necessary for the rungs to be ready when the class started.
 |
| Chair Jig |
Locating and cutting in all of the needed holes for the rungs, seat, legs, and arms was simplified with the use of this jig which Beth also bought for making her second chair. As part of the course, Jeff provides a very complete manual that shows how to make the chair. The last part to be assembled are the arms. When you look at it they seem to be tenoned into the rear leg and also onto the front leg -- a process that really isn't possible! Instead, the fronts have a small recess used to locate them and they are then drilled and pinned from above. Beth hand carved these pin tops into an octagon shape.

 |
| Waxed cord to splice Hickory |
 |
| Completed Seat |
Beth showed how to use the drawknife and spokeshave to take square stock and make it round. The process is one where the stock is taken from square to an 8 sided piece (octagon), then 16 sided, and finally 32 sided mostly with the drawknife. She then refines that piece with the spokeshave until it is as round as possible. Here the stock is in a vise which is a bit awkward -- remember she gave herself the present of a shaving horse which is now in her shop to make this process much easier and enjoyable!

