 |
| Hope I Don't Put Dennis to Sleep! |
That may be one of the reasons she asked if I'd like to lead the meeting since I was at the head of the table anyway, as long as I don't have to pick up the check it was okay by me:
 |
| Let's Do This |
We started out with the "traditional" round robin of who are you. Some of us are getting a bit lax, you can tell us more than your name! We had one new member, Leroy Wilson who also brought some projects he's made. Those will be in the show & tell section at the end of this blog. During the introductions Ed mentioned that Toys for Smiles has a bunch of Cherry and Red Oak that they're selling for excellent prices. Roughly 1600 b/f of Cherry for $2.25, this is 15/16", random width/length. Also a number of Red Oak boards of various sizes which are sold by the piece. Toys for Smiles is located at 3170 Polaris, Suites 17 & 18. There was a lot of interest in this so you might want to get there soon as you can if you haven't already.
Next up, Jamie was just about ready to start talking about a book and pamphlets she had but; just as if it were planned, Eric walked in and she passed the baton to him since it was something he was responsible for:
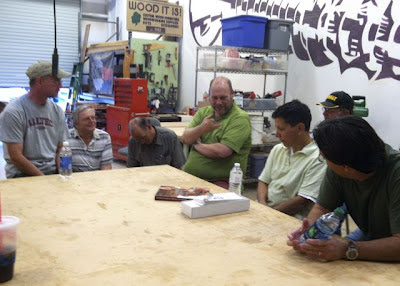 |
| Jamie Excitedly Contemplating Her Talk |
I'm going to assume that everyone who's ever picked up a woodworking magazine has heard of Bob Flexner and may also have a book written by him. He is probably the best known person when it comes to ways to finish wood or repair poorly finished wood. As it turns out, Eric's father-in-law knows him personally and lives where he does in Norman, OK. Since Eric is a woodworker he quickly agreed to visit Bob Flexner and spend the day with him at his shop. The first surprise was the condition of the shop, you'd think that someone with Flexner's reputation would have the best, latest, and newest tools at his disposal but that wasn't the case. The main feature was an old Shopsmith and many tools which Eric described as not being in the best of shape! Bob started out being a furniture maker which wasn't very profitable (sounds familiar!) so turn to repairs which eventually led to him specializing in refinishing of furniture. Repairs and refinishing are two areas where expertise is required, you can screw up a nice piece of work real quick. Here's a link I found about Bob Flexner which has articles and tips by him regarding finishing. Eric had brought in pamphlets written by him and all of us were able to get one.
 |
| Flexner's Book |
I was the scheduled demonstrator for the meeting and my goal was to share some techniques of hand tool woodworking that I thought may be of value. The focus was about making boxes and techniques that made handling small pieces of wood safer.
 |
| Demo Tools |
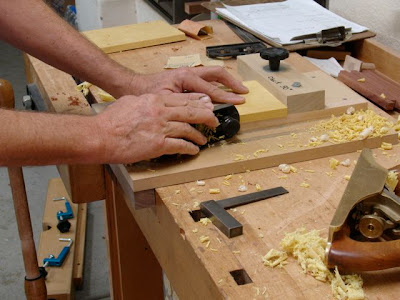
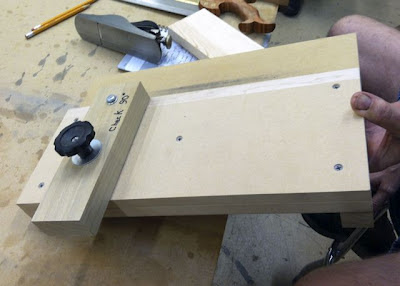
From left to right is the shooting board with block plane, dovetail saw and bench hook (under notebook) and some marking tools. My focus was on the shooting board which is a great, shop made device used to square miters, ends, and edges of a board perfectly. They can be made any size you need to fit your work. Here's a close up of it:
 |
| Shooting Board |
What is does is make an area to lay the plane down which is square to the section that the wood is placed on. This one is made of Ultralight MDF and has a Maple wear strip laminated on the side to provide a hard surface to "shoot" the plane against. The only variation I know of is to hold either the plane or the board at an incline to utilize the entire blade on the plane. I know one member has already made his version, if you want details feel free to email me.
Traditionally you would probably use a larger plane, possibly a Jack. Since my focus for this was small work I made it to be used with a block plane. Lie-Nielson's company was mentioned and they make a dedicated Shooting Board Plane . I'm afraid we'll have to wait until Richard gets one to see it up close and personal!
Another device that makes cutting small pieces safely is a bench hook:
 |
| Bench Hook, Notice the Miter Fixture on the Shooting Board |
Once you've cut these small pieces the next step is gluing them together. When you take a mitered joint and add slippery glue to the mix it's a real chore to hold it all together and clamp it. By using packaging tape the process becomes controllable and easier.
 |
| Packaging Tape Assembly |
When the pieces are ready for assembly you simple place them end to end on a length of tape, apply some glue to each miter and basically fold the box together. You can check for square and add tape as needed to make all the corners square. This works for mitered boxes of any size but you may want to add another wind of tape or a band clamp if your box is much taller than the tape.
After the demo was complete several of you gave the shooting board a try and, I hope, found it to your liking:
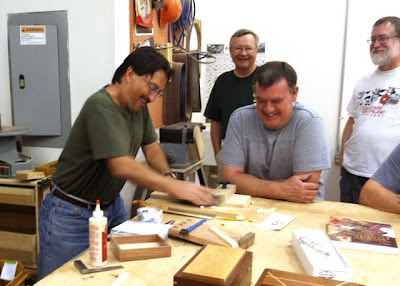 |
| Leroy Giving it a Try, Notice the Completed Tray by the Glue Bottle |
For the Show & Tell segment, Leroy brought in a few examples of the boxes he's been making, I overheard someone ask him what kind of wood there was in one of them and his reply was "a $10.00 garage sale coffee table", that's being resourceful!
 |
| Trio of Boxes |
 |
| Interior Detail with Sliding Tray |
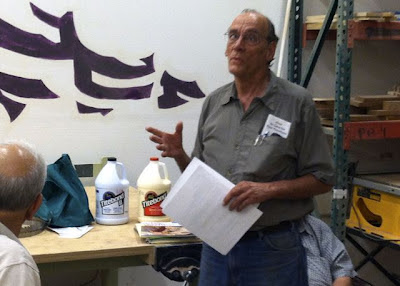
Ted, who's fairly new to our 100+ degree desert shared some glue information that he researched out of necessity. He's currently working on a staircase that requires lots of glued up Oak. When our temps start to climb we need a glue with the most open time we can find, it's also imperative we do that dry run.
 |
| Ted with All the Data |
He found that Titebond makes an extended wood glue (white bottle) which claims and open time of 15 minutes versus their regular glue (yellow bottle) which has a 5 minute open time. They said that's at 70 degrees and it may get a bit warmer than that in the average, Las Vegas shop. I know though that Ted has a 2 ton air conditioned ready for installation in his insulated shop/garage -- lucky man!
 |
| Titebond Glues |
The extended glue cost is $10.00 more per gallon from Louis & Company and someone mentioned that smaller quantities are available from your favorite, big box store.
