Thursday, February 16, 2012

Tabled at the Meeting

Waiting by the Heater
     The monthly meeting of the Sin City Woodworkers for February was well attended in spite of our chillier than what we've become used to , weather.  Thankfully, Jamie had fired up her propane heaters so several groups of us were gathered around them, keeping warm, until the meeting started.
     The focus of this meeting was Tables, specifically how to attach the tops to the leg and apron assembly.  Jamie explained how you must take the movement of the wood into consideration.  You can't just screw or, heaven forbid, nail that top down tight!  Living here in the desert, the seasonal swings of humidity aren't much of an issue but if you've ever brought a piece of wooden furniture from a different climate, chances are pretty good that it has developed splits and cracks as the lack of humidity here causes the wood to shrink.  This shrinkage and expansion occurs across the grain of the wood and is pretty substantial.  So the problem is the wood moving in width, not length.  Now, how do you deal with this when you're planning to make a table.
     If the table top is relatively small, like say on a plant stand; you can probably get by if you elongate the hole for the screw used to attach the top.  When you do that though you can't be Joe Knots on the screw!  It needs to be snug enough to hold the top in place but not so tight that it prevents that seasonal movement.  A store bought counterpart to that would be what's referred to as a figure 8 fastener.  Although there isn't a picture to illustrate it, you can imagine a piece of metal in that shape.  One end is fastened to the apron and the other to the top.  The holes are large enough to allow a bit of movement.

Shop Made Buttons or Wooden Clips
     An excellent but time consuming way to attach the top is this shop made method.  You can see the 10 buttons/clips attached to the bottom of the top.  These ride in a dado cut into the tops of the aprons.  Basically, this piece is a step with a countersunk screw hole.  The thin part of the step is inserted into the dado and then screwed to the top.  That inserted step is long enough to allow the top to expand/contract as it wants.  Although time consuming to make, these add to the craftsmanship of the piece.  You can make a stepped blank long enough to cut many buttons out at a time.  The time comes in as you drill, countersink, and then sand them for that quality look.  It's important that the grain runs the long way for strength.

Metal Z-Clips
     Here Jamie is showing how metal z-clips are inserted into a saw kerf in the apron.  This is probably the easiest, quickest way to solve the table top mounting issue.  These clips are available from local as well as on line sources.  You can see the saw kerf that she cut at the top, inside of the apron.  About the only way you can fail with this system is if you forget that kerf before you assemble the legs and apron!
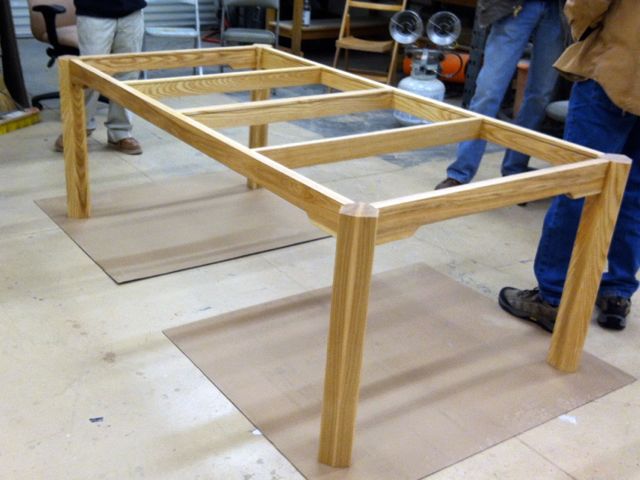
     To illustrate these things Jamie had two, beautiful table bases to share with us.  Both were made of 8/4 Ash and different in their design and construction.  In case you missed the story behind this one:

Trestle Table
     She had originally done a similar table for a client, the design inspiration is from the Hilton sign.  That commission was made out of Mahogany and since she needed a table and kind of liked this one she made a copy for herself.  Well, you know how woodworkers can be -- what looked good on paper and in our heads sometimes changes.  This one's on Etsy but if you want to save on shipping you could probably pick it up from her.  This example can be "knocked down" to make it easy to move.  She demonstrated how the fittings are installed and work.  They're the 6 black circles seen on the side.
     The other table she used was this one:

Ash Apron and Legs
     This one too is made of 8/4 Ash but it's not a knockdown design and about 7' long!  When you build a piece like this you better plan first if you can move it to where you want it to be, No spiral staircases for this one!  You'll notice that the apron is relieved towards the middle but left as wide as possible where it's mortised and tenoned into the legs.  That's where you want the strength but in the middle you want room for peoples legs.  The legs on this table are beautiful.  They started out being 5 sided which is pretty unusual but then when the facets were cut on the outsides they became a 6 sided design.  The inspiration for them came from this book:

     The picture has some glare but the title is Creating Coffee Tables and here's an Amazon link Creating Coffee Tables  if you're interested in adding it to your library.
     The other book that Jamie referred to for design parameters and concepts is actually available from Amazon as well, however; at $135.00 a copy you may want to explore the internet for free resources, there are many practical design books available that are probably a tenth of that cost.  If you want to check it out though, here is the Amazon link to Seth Stem's book.
     Another activity we enjoyed at this meeting was seeing some of our members work and collections.  Allison brought in her unique project:
Allison's Secret Jewelry Stash (shhhh!)
     This was a really well constructed, half lapped, Oak frame which also doubles as a mirror.  We're sworn to secrecy but it's a clever concept.  This is the rear view of it and you can see how she's used a mesh to hold earrings with a French hook.
     Neal has been busy trying his hand at carving and shared this project with the group:
Basswood Plaque
    Many of you may remember that he's recuperating from a pretty nasty accident and has taken up the challenge of carving to keep his sanity!  All agreed that this is a very nice piece.
     Ed brought in this plane, another part of his sons yard sale find in the Carolina's:
Ed's Plane
    This style is known as a Transitional Plane and was manufactured by the Stanley Company.  Today we might refer to it as a hybrid.  It was to help woodworkers transition from using a wooden bodied plane to a steel one.  Kept the wooden sole but added the metal parts to adjust and hold the blade.  If you handled it you may have noticed that if you're hands were large it didn't fit!  I know people were shorter in the 1800's so it would stand to reason that their hands may be smaller too.
     We ended the evening with Ted's Treasure Trove:
Beautiful, just Beautiful
     Ted told us that he's been collecting and gathering tools since he was a teenager.  Many of the younger members of the group have probably never been exposed to the beauty of old tools.  The beautiful brass objects in the middle of the table are plum bobs.  They've been replaced by lasers and a double duty chalk box that functions somewhat like a plum bob does.  You can see trammel points, a glue pot, old style molding planes, a brace, and Rosewood and brass level.  The beauty of these tools is that now they're almost considered to be a work of art with the engraving and designs cast into them.  A far cry from the mass produced, Chinese imports that fill the big box stores today.  Ted mentioned that he could probably bring stuff for a year and never show the same thing twice.
     All in all, a very good meeting and I think everyone would agree.  It was nice having people bring stuff in to share with the rest of us.  As always, I'm going to encourage you all to plane a demonstration to share with the rest of the group.  Many have stepped forward so don't be bashful -- besides if you do it'll save you the $20.00 dues for the year.

Tuesday, February 14, 2012

Tables and Such

     Just to remind all of you about our monthly meeting, tomorrow beginning at 7:00 pm.  In case you missed the MeetUp reminder that Jamie sent out the subject will be tables.

She put in a teaser:

A   5 - legged table

 chez, I never heard of such a thing!  

     That alone is worth the price of admission.  Tables are one of those pieces that every woodworker will want to tackle sometime during their woodworking adventures.  They have lots of design considerations in regards to leg and apron joinery and the all important concern of making and connecting the top to the apron.  You have no doubt seen the ones Jamie's been working on during the last few meetings, now's the time to ask her questions about them and carry them back to your own shop.

See you there, remember to bring a chair and a friend if you want. 

Sunday, January 22, 2012

Wednesday, January 18th. Meeting

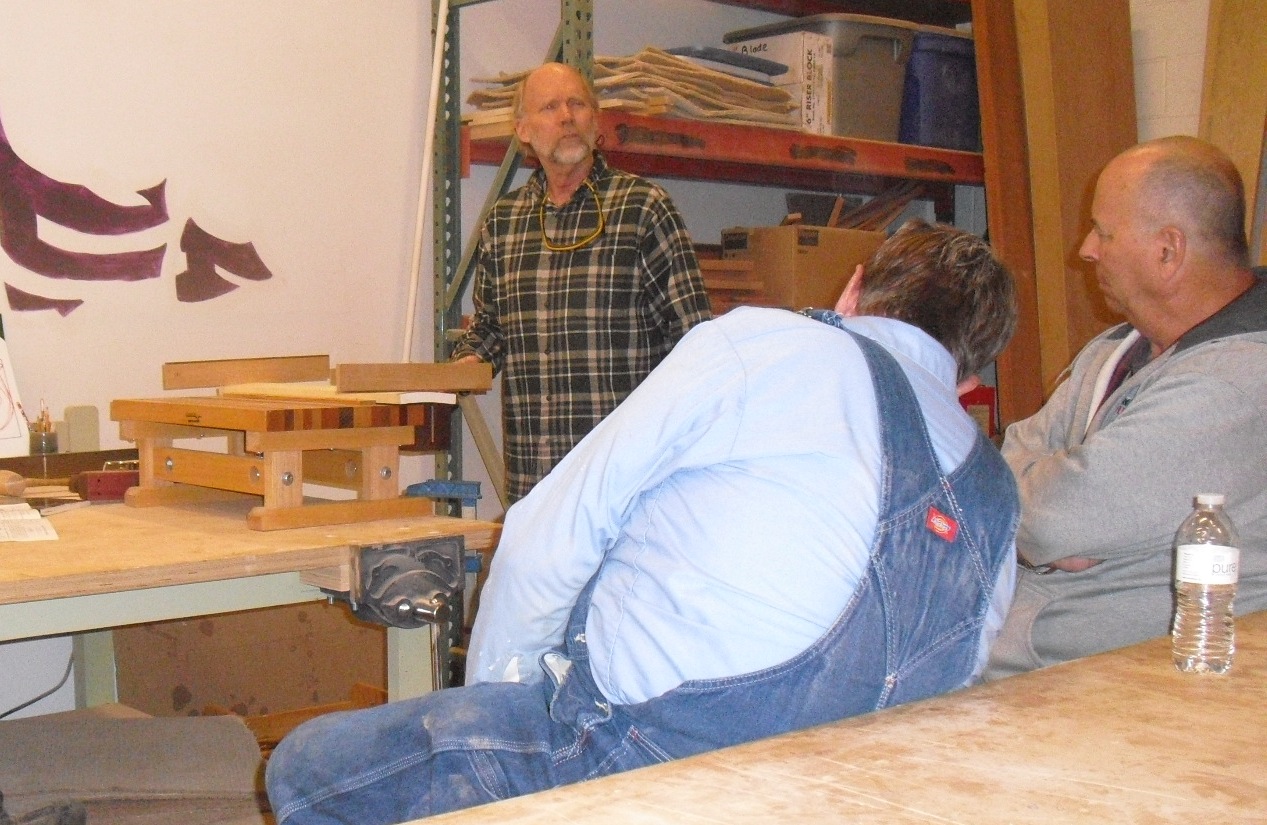
     At our January meeting we had several new faces who came out in spite of the chilly weather we've been having lately.  Lucky for us, Jamie had a couple of propane heaters going so it was quite pleasant.   Being this months presenter and demonstrating hand planing I managed to keep warm enough with my plane work!  The goal of this demonstration was to show how you can get a warped, cupped board into a usable condition.  Many of our members have a power planer of some sort or another but usually not a jointer.  No matter what you do, if the board is cupped or warped and you run it through your planer all you'll get is a thinner, cupped or warped piece.  
     There is a traditional method to flatten a board and that's done with what's called a Scrub Plane.  These are designed to take shavings as thick as an eighth of inch off a board with a blade that has been radiused.   Having recently built one Jamie thought it would be a good demonstration for the group and hopefully you all agree.  The blade I used was from Ron Hock who makes excellent tools including chip breakers, plane blades, and spokeshaves.  The blade is designed for what has become known as the Krenov style plane.  My design modified this style by adding a handle  (tote)  to the rear and a contoured knob to the front.  This was to have more control and a better grip on the tool.  See the photo below:


Over-Sized Drawing showing main Scrub Plane Parts
     To begin the scrubbing process, the plane is pushed sideways across the high spots of the board.  Even in this picture you can see the huge cup this board had.  Luckily, Lowe's marked this almost $9.00 piece of Aspen down to a buck so you know it was pretty humble!  As you're planing you can hear the difference as to whether you're going with the grain or not, even when skewing the plane diagonally across the board.


     Here's a short video showing the scrubbing action and the shavings it produced.  If you listen you can hear when the board didn't like the way the plane was traveling across it.


     To gauge your progress you can use what's called Winding Sticks.  By placing these across the board and then sighting over them you can determine where the board is high or low.  You could also lay it on a flat, machine surface to see it it rocks or not.  To flatten a board in a power planer one side must sit flat.  As you can see in this picture, the cup in this board is so bad you really don't even need to use the sticks!

Using Winding Sticks

     Once the cup or warp is removed, it's time to take a jointer plane to remove the somewhat scalloped cuts made by the scrub plane.  There isn't a photo of that but in the video below you can see it laying on the bench.  I have an old #7 Stanley.  That plane is 22" long so it can span a lot of surface to flatten it out.  After all of the scrub plane marks are gone it's time to pull out a smooth plane.  This plane features a very slightly cambered blade and a tight mouth.  It should be set to take a super fine cut.

Final Flattening with a Smooth Plane, Jointer Plane use not shown

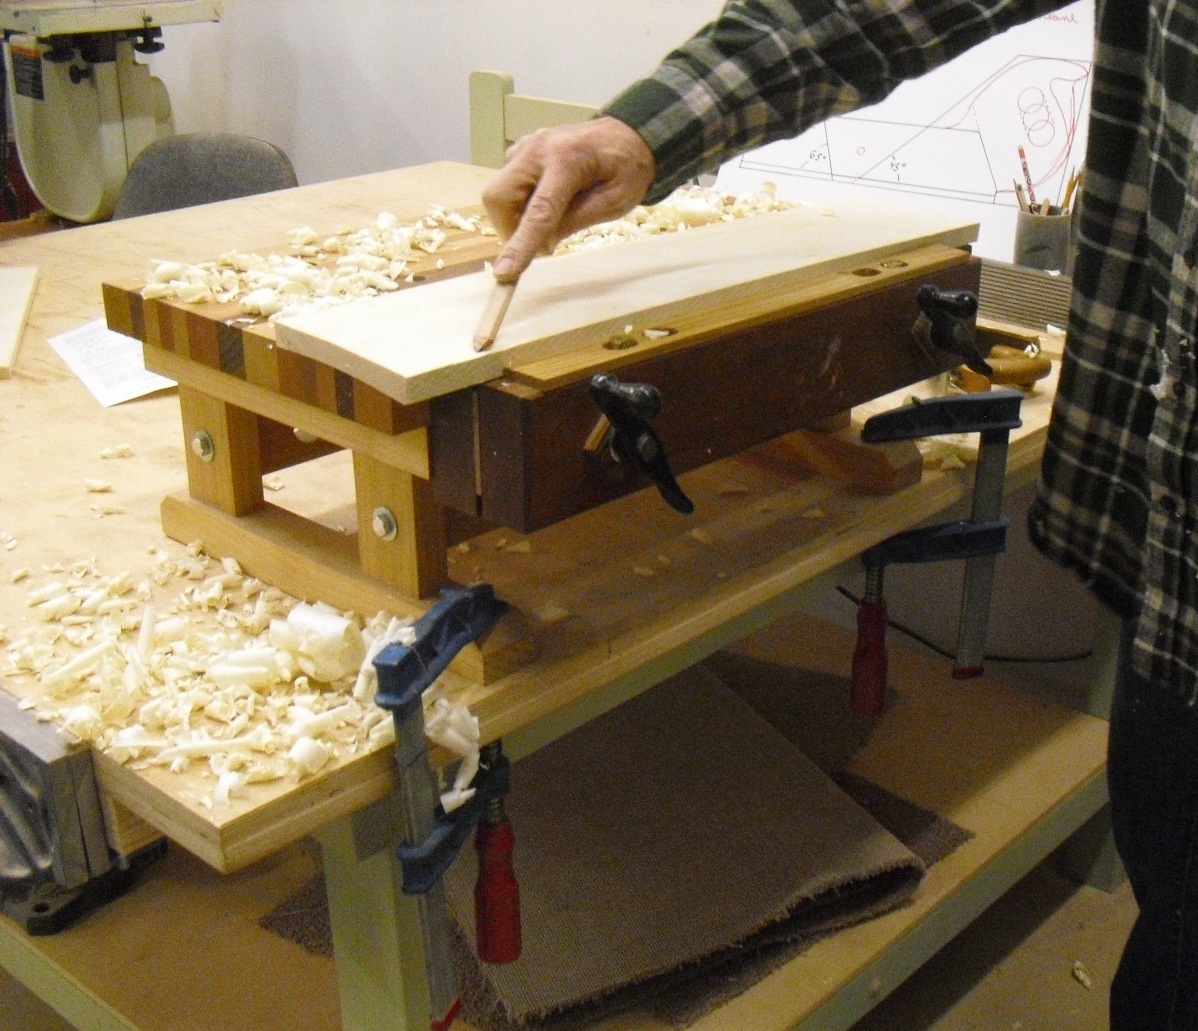
     Before starting with the smooth plane it's a good idea to make pencil marks all across the board for a visual reference.  Once all of them are gone you know you've planed the entire surface and it's time to do your final dimensioning and smoothing.  If you have a power planer you don't need to do the opposite side unless, like me, you love the look and feel of a hand planed piece of wood!  For the demonstration I did show how to do the opposite edge.  In that instance you run the scrub plane only over the high, outside corners of the cup.

Using a Pencil to mark across the board.  Visual Aide to see where you've planed.

     Here is another short video showing the smooth plane in action.  Again, listen carefully towards the end of it for that protest from the board as the grain direction changes and it told me to change direction:


     A number of you asked about the possibility of holding a class at Jamie's studio to make your own plane.  I've taught hand tool work at the studio and also do one on one instruction at my shop.  Jamie told me that if there is interest we could schedule a 3 day session for making your own planes.  I don't know but Ron Hock may give some discount if we were to place a quantity order.  The bottom line is that this is all possible.  I've personally taught many people how to set up and use hand planes and the majority of them really like adding that to their bag of woodworking techniques.  If you're interested in that contact either Jamie of me so we can  set that up.
     There's something very satisfying to working in your shop quietly, no dust, no machines roaring, no whirring blades and producing a beautiful board after making a pile of shavings like these:

Fine Shavings = Fine Board

Monday, January 16, 2012

Meeting Reminder: Weds. January 18th.

No matter how you look at this, right side up .......


                  or wrong side down  .........


     This is one, cupped board !!


If you're a smart woodworker you'd never take this piece home with you but what if it's all they have?  Worse yet, what if you don't have an 8" wide jointer to tame this nasty board?  Well, with some luck the demonstration at this weeks meeting will try to answer that question.


Usual time:  7:00 till ??
      Same Place:    Wooditis Studio
                                2267 W. Gowan
                                    North Las Vegas, 89032


                 Hope to see everyone there.

Saturday, December 24, 2011

Christmas Party Part 2: Oscar Meyer vs. SawStop


Hot Dog 1 / SawStop 0

     One of the exciting things at our Christmas Party was a real, live, SawStop demonstration.  Jamie had managed to obtain a blade and a new, replacement cartridge from SawStop so that we could see the machine in action.  SawStop was good enough to also donate a bunch of their hats with the logo prominently displayed on the front -- really nice hats!
     I think that most of us had seen a video of the SawStop in action and it's really an amazing technology.  Being a retired shop teacher I'm only too aware of the joke about a shop teacher trying to order ten beers with a number of his digits gone!  But, check this out, the video below is the one that Jamie took and it should open up easily.  After you watch that one, click on this link:

                              http://www.youtube.com/watch?v=AygWhR2E6Kc

     Lupe took this with her I-Phone and it even has a slow motion section to it,  I can see why the insurance industry likes this piece of equipment.  I do admit that in my career as a woodshop teacher I've only had one serious accident and that was with a hand held chisel.  I'm sure that as a student, kids are pretty apprehensive  using  tools, the danger comes when we get accustomed to our machines.

               Happy New Year to you All

Friday, December 23, 2011

Sin City Woodworkers Christmas Meeting 2011

     On Wednesday, the twenty-first of December we held our now traditional, end of the year, show &  tell Christmas Extravaganza at Wooditis.  This is the time when members bring in an example of their work and gives everyone a chance to put the woodworks to a face!  It's always a treat to hear about the  projects that  members of our group are  working on our have done in the past.  We had some holiday libations and snacks and lots of interesting conversations about just about everything!  Among those items members brought in was beer, wine, cookies, nuts, and cupcakes,  mmmm good! As the members started to arrive, Ann was in charge of the raffle tickets making sure everyone got their name into the hat -- a SawStop hat of course!

Donated DVD from Jimmy Clewes
     One of the donated items was a DVD from Jimmy Clewes and his lathe work.  Jamie and Ann had recently taken a class from him and this raffle prize was won by Pat.

1" Marples Chisel
     Another donated item was a 1" wide, Marples chisel that was won by that lucky Jim!  Not sure but he might consider a career as a professional gambler since he seems to have good fortune on these games of chance!  There were two very nice water bottles won by Aaron and Rich, Nikki scored a new, but empty, glue bottle while Bill was able to get his name drawn and selected a cooler sleeve from Rockler.  Kate started the raffle off by winning a cool looking T-shirt from Western Dovetail drawers.

     Next was the special drawing for all of the dues paying members of the group.  With the remaining funds from dues received this year, Jamie bought gift certificates from Lee Valley, a company any woodworker would be glad to get goodies from!  Aaron received a $25.00 gift, Ed a $50.00 one and that lucky Jim scored with the grand prize of a $100.00 gift certificate.


     The next activity was to have members that brought things in to share do their show & tell.  This always generates questions regarding technique, materials, costs, and anything else that went into the piece brought in.  Here are the items and projects that were brought in to show.
Ed's Leg Vise

Ed brought in his recently completed leg vise for the huge workbench he's making.  He was kidded about the fact that some members thought it was a nutcracker in keeping with the spirit of the season!

Stanley #55 and Cutters
     Another item that he brought in was a set of cutters for the Stanley #55 Plane that his son got in a tool sale from Craigs List.  Once Ed figured out what they were and the value of them he immediately  went to E-Bay and found a complete #55 in good shape and at a decent price.  Having experimented with the equally complex #45 I'm anxious to see how he makes out with this.

Jim's Sleigh


  Lucky Jim brought in one of the first woodworking projects from about 15 years ago or so.  It's this really neat sleigh, I believe the plans were from Shopsmith.  In any case, he carefully routed the sides to give the appearance of  boards and laminated thin Oak pieces to form the runners.  The suspension pieces were from a kit offered along with the plans.


Neals' Cutting board and portfolio of Work
     Neal brought in a beautiful cutting board which at first glance, seems to be a checker board!  If you've ever worked to smooth end grain you can appreciate how nice it was.  He also shared the projects he's been doing on his cabin in Utah.  Lots of great looking rustic pieces of knotty pine and logs.  He said he likes working with the logs because if you're within a 1/4" that's close enough!  Glad to see that his terrible injury from an accident last year is on the mend.

Aaron's Display Wall
     I wish I could show this project but since Aaron didn't bring in the wall the pictures will have to do!  His house had three openings between two rooms and his wife asked if there was anyway to close them off.  He came up with a really cool plan that included adjustable shelving and rope lighting to add that custom touch to the work.  Jamie mentioned that a job such as that could easily cost $5,000+ and seeing how he spent somewhere  in the neighborhood of $600.00 for all the materials it was not only a great looking project but quite profitable.  That's one thing we all have in common, being able to produce quality work at a cost much lower than a contractor may charge.  Plus, we get the satisfaction of knowing what we accomplished -- I think that's called bragging rights!

Ted's Portfolio
     Another member who brought in his portfolio of work was Ted.  When he was in the San Diego area he became acquainted with a rich client (don't we all want one of them!) and through the course of about five years did an amazing amount of work for him.  Many of the projects that Ted designed and built were a combination of antique styles but they all incorporated design elements that were in the house already.  I saw most of our group cringe when he told of the Mahogany paneling that had been painted sometime during the homes history.

John's TV Tray Redux
     John brought in a set of three tables that are his take on a modern TV tray.  They're Walnut with Zebrawood inserts and can be used as a trio of low display tables but work best as separate side tables.  Several members were surprised at how stable they were since they only have three legs each.  The legs are splayed out and attached with a through tenon that was wedged with Maple wedges.

Ann's Bowl with Aniline Dye Rim
     Ann and Jamie recently attended a turning class by Jimmy Clewes and brought in the "fruits of their labor". Their work was stunning, you can see the vibrant colors that she managed to get into the rim of this Ash bowl with Aniline Dyes.  She said they would put on one color, sand, then add another color, sand ....... until she came up with the results you see here.  She also made a lidded box (lower right corner of picture) that had the turners "pop" when the lid was removed.

Jamie's Bowls and Lidded Box
     Jamie completed a similar design bowl and used blue tones to color the rim.  For her lidded box she chose a tray that has the box in the center of it.  I could see where this would fit right in with her sushi plates she does with her ceramics.  It was pretty amazing the quality of work that she and Ann came home with after the class with Jimmy Clewes.
Lupe and her magic Spirit Box


     The final act of the night was presented by none other than Lupe, our resident magician!  She brought in this box which she referred to as a Spirit Box.  How she did what she did is a complete mystery!!!
Some how, by inserting ropes colored red and white into the box from different ends they became knotted.  Then, as if that wasn't enough, she put a rope completely through the box, threw in a solid metal ring, and some way or another the ring ended up on the rope!

Everybody walked around scratching their heads over that.  The final act of the evening was the amazing hot dog vs. SawStop and I'll talk about that in my next blog ---- like they say on TV "film at 11 o'clock"

Friday, November 18, 2011

Adirondack Chairs Meeting

Jamie "holding court" in her Lyptus Chair
     At our Sin City Woodworkers meeting last Wednesday the featured topic was a show and tell of the recent class Jamie taught on making Adirondack Chairs.  It seems only right that a very tired Jamie would run the meeting from her "Lyptus Throne" after several long days helping her students to get ready for the evening.  The chairs were absolutely stunning and as a teacher I can really appreciate the work that goes into them and teaching all of the skills needed to the entire class -- well done Jamie!
     Adirondack Chairs originated in the Adirondack area of upstate New York which was a playground for the rich and famous.  Their design is perfect for kicking back and having your Manhattan iced tea or whatever else you like to unwind with.  People who sat in the various chairs the class made all commented on how comfortable they are.  Although the designs were similar, each chair was customized by the builders to reflect what they wanted.   Materials were chosen by each student and price varied from from $100.00 or so for those made of Poplar or Alder,  a Redwood example was around $140.00, Cherry @ $150.00, to Bobbie's Mahogany pair at around $250.00 each.

King & Queen Version by Bobbie
     These chairs, although they look similar, have subtle customized features.  One is slightly larger in width and since Bobbie and her husband have long legs they feature a deeper seat.  The Mahogany used will be oiled and should be beautiful.

Nikki's Version
     Nikki designed her's for an older friend who needed a somewhat larger version than the standard size.  She also elevated the seat to make getting in and out of the chair easier.  That was one of my concerns, I can imagine sucking up a bunch of libations to unwind and then not being able to get out of the chair.  Guess that's better than an anti-drunk driving interlock device on my car!!

Lupe's Cherry Version in Foreground, Poplar Example in Back
     Here is one made of Cherry and the example below is made out of Redwood.

Steve's Redwood Version

     Members noted the subtle differences with each chair.  The designs of the back slats gave each one a distinct personality.  Inspiration for one of them came from a chair the builder remembered her grandmother had.  Other ones varied the spacing between the boards but the most obvious change was how the tops of the boards were cut, angled, or curved.  On average the chairs took about 25 hours to complete -- time well spent to create a beautiful, heirloom project.

     Before we started our discussion/admiration session on the chairs we talked about our next meeting, the Christmas end of the year one.  We'll have an informal show & tell from all of us where you can bring in a project you've completed and want to share with the rest of the group.  We did this last year and it was a good opportunity to see what type of work we like to do.
     SawStop -- who hasn't heard of this machine?  Well, it should be a lot of fun to watch this hot dog cutting machine in action!  Jamie has gotten an extra blade and cartridge so we'll all get to witness first hand how this technology can save our digits.
     An other thing for the Christmas meeting is there will be some kind of raffle for paid up dues members.  From what I know they will be gift certificates to our favorite woodworking stores.  The last item that came up was some samples of Smoked Poplar that Peterman lumber brought over for us to look at.  Not sure how the process goes but it's purpose is to mimic Walnut, it'll sell for around $4.00 b/f in 4/4 stock.
      The meeting ended with trying out the various chairs and just talking wood!  Here are a few pictures of us during the meeting:

Everyone's Paying Attention!

The blue chair is not an Adirondack!!

Just Waitin'


     See you all at the Christmas Meeting, think about what you may want to bring to share with the group.