
 Well, as you can see from these pictures, we had a decent turn-out at our November meeting last Wednesday night. Some of you try to move around so I count you more than once but at my last tally there were about 30 in attendance. As Jamie pointed out during our traditional, round robin introductions we are having more women attend the monthly meetings and I'd attribute that directly to Jamie's influence and teaching. She creates a welcome atmosphere which encourages both men and women to stick around and learn what they can about this craft of woodworking we all enjoy.
Following the introductions we had the business portion of the meeting. This is the final meeting where we can remind you about the Chopped Challenge which will culminate with an anonymous judging at the end of the year Christmas party. If need an entry for this send me an email using this LINK and put Chopped Entry in the subject line so I know it isn't a spam -- Thanks.
I'm sure many of you attended the Lie-Nielsen tool event and according to Jamie, it was a huge success thanks in part to many of you that volunteered to help with shop clean up and organization. Lie-Neilsen has expressed an interest in holding the event again next year and were pleasantly surprised the the turnout from Las Vegas woodworkers exceeded their expectation.
One last bit of business that many of us weren't aware of is that there are used tools available for sale from members. Jamie has set aside some space to place them and it's a free service she's offering us. I saw a lathe and bench top mortiser but know there's more! Give her a call or if you're in the area perhaps you can drop in to see what tools are available or maybe you have something you don't need anymore and want to sell.
Show & Tell

There were a couple of show and tells at this meeting starting with our photographer/videographer Lupe herself. Oddly enough there was only one picture of her project. This doesn't begin to do it justice. This is a stool designed by Tage Frid; one of the woodworkers who were instrumental in the 60's and 70's that brought furniture and woodwork to a new level. Those of you that are of the younger generation may not be aware of some of these folks but if you do a google search for him, Sam Maloof, James Krenov, Art Carpenter and a few others whose names escape me now and you'll uncover some fascinating, old school, woodworking history. This stool Lupe made is simple looking but very complex with it's angled joinery, not only in the legs but also the way the seat and back rest are dovetailed together. Not only did she challenge herself with the construction and joinery, she also used different finishing techniques with aniline dyes, shellac, and lacquer. Here is a picture of the stool from Tage Frid, it's featured in one of the three classic books he authored about woodworking.


If you attended last months meeting will recall how Zac showed us how to cast resins and use them for creating blanks for turned pens. Angela took what he showed us and turned these two pens which have genuine, Nevada Sagebrush cast into their bodies -- very nice work.


Ed brought in a collection of Stanley planes that he's been amassing for quite some time now. As I recall it all started with his son in one of the Carolina's sending him a beat up one that he brought back to life! I think the "old tool bug" has bitten him.

 A newcomer showed up with a few items he's been making, one of them being this wooden tie. His name is Billy and he also makes some pretty intricate puzzles as this parrot on a perch shows. Glad no one dropped it as there are many, many parts!
Feature Presentation: Nelson E. Cassinger

Nelson is a woodturning artist who currently lives in the Las Vegas area. He's been turning wood for over 18 years and has been a presenter at the annual Utah Woodturning Symposium on numerous occasions. His work is known the world over. He mentioned that a Las Vegas client of his presented the Queen of Nepal with one of his bangles! He specializes in segmented turnings which, as you might imagine; take an awful lot of prep work to not only cut all of the small pieces to the required size and shape and then glue them together. Designing them requires a lot of paper, pencil, and compass work. He uses Bordens ProBond glue to assemble his creations and, surprisingly; although many pieces are glued up no clamp is required since they tend to lock together due to the angles. He mentioned how his eyesight is failing which has curtailed his ability to create the turned vessels he brought to show. He now concentrates strictly on creating these marvelous bangles.
 The primary focus of his demonstration was how to go about making the jigs required to turn the bangles. This begins by turning a disk the required size for the inside diameter of the bangle, he has three basic sizes but recently had to go for an extra large to accommodate his clientele. In the photo on the right you can see the line drawn in to get him to rough diameter. He then uses gauges to turn them to the diameter needed. Nelson really likes a wood turning tool made by EasyWood which are carbide. Many of the turners in our group seemed to nod their approval of them when they were mentioned. I hope I wasn't the only one slightly confused as he was turning his mandrel/jig but it became clear as he actually finished a previously started bangle. Creating a turned, segmented bangle begins with first making the mandrel to hold it safely on your lathe.
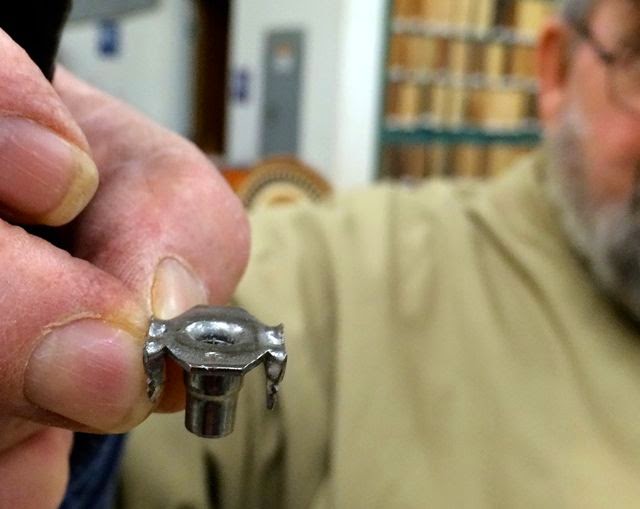 |
| T-Nut |
After making the jig Nelson took this previously glued up blank:

and turned and finished it with the friction polish to end up with this!

If your vantage point during the demonstration wasn't the best and you had some difficulty seeing and hearing what Nelson was demonstrating, here's a link to a great video that Lupe made of it:
https://www.youtube.com/watch?v=2sxf77qr48k&feature=youtu.be
While you're on that YouTube Channel, check out some of the others too.
Last of all, here are some pictures of his previous work.


While you're on that YouTube Channel, check out some of the others too.
Last of all, here are some pictures of his previous work.
No comments:
Post a Comment